The best way to repair small tears in leather tack is by cleaning the damaged area, using leather-safe adhesives or repair kits, and conditioning the surface after repair to restore flexibility. Tack with minor damage doesn’t always need replacing, prompt and proper care can prevent the tear from spreading and help preserve the safety and value of your gear.
Here’s a step-by-step guide on how to repair small leather tears and keep your tack strong and ride-ready.
Why You Shouldn’t Ignore Small Tears
Small tears in leather tack may seem harmless at first but can quickly become serious if left untreated.
Prevent Further Damage
Even the smallest cracks or tears can expand over time.
- Leather weakens when exposed to tension and moisture.
- Tears compromise structural integrity, making equipment unsafe to use.
Maintain Appearance and Function
Timely repair keeps tack looking polished and functional.
- Stops fraying and keeps stitching intact.
- Preserves the professional look of your gear, especially for show use.
Assessing the Type and Severity of Damage
Before jumping into repairs, examine the extent of the tear.
Surface vs. Deep Tears
Different damage requires different approaches.
- Surface scratches or minor scuffs: Typically fixed with leather conditioners or dye creams.
- Deep cuts or tears through layers: Require gluing, stitching, or patching.
Check for Structural Risk
Ensure the damage doesn’t affect safety-critical areas.
- High-tension areas (girth straps, billets): Should be evaluated more cautiously.
- Weight-bearing components: Might require professional inspection or replacement.
Supplies Needed for Leather Repair
Using the right tools ensures a clean, long-lasting fix.
Basic Repair Kit
Most minor repairs need only a few essentials.
- Leather-safe adhesive or contact cement: Strong and flexible when dry.
- Leather filler compound: For smoothing out small holes or surface tears.
- Fine-grit sandpaper: Helps blend repaired areas.
- Leather dye or recoloring balm: Matches the repaired section to the original.
- Soft cloth and sponge: For cleaning and applying products.
Optional Tools for Deeper Repairs
For slightly more advanced fixes.
- Leather patch or scrap piece: For backing deeper tears.
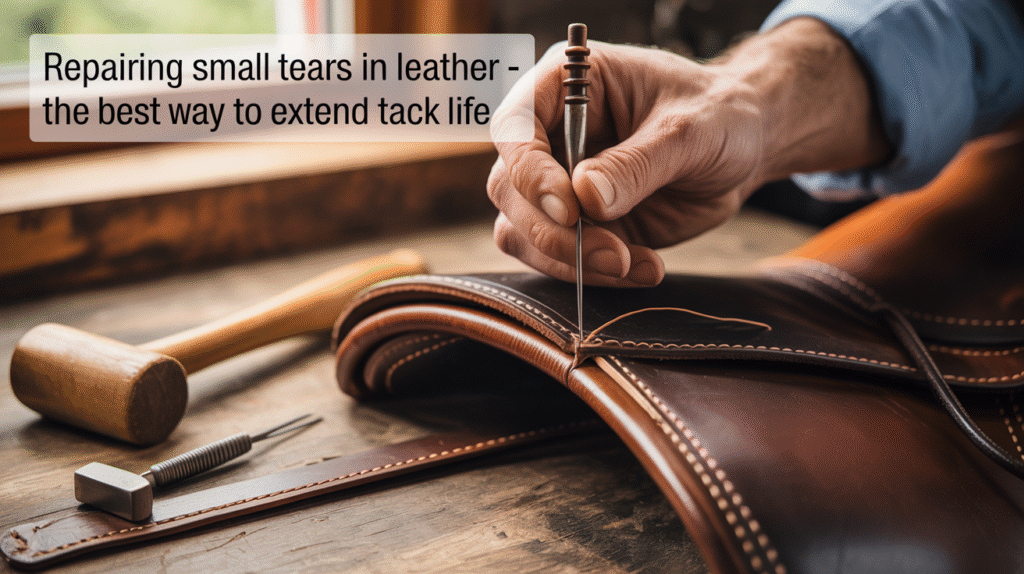
- Needle and waxed thread: Hand stitching repairs in high-stress areas.
Step-by-Step Guide: Repairing Small Tears in Leather Tack
These steps apply to saddles, bridles, reins, or any leather riding gear with small tears.
Clean the Area Thoroughly
Start by removing dirt, oils, and conditioners from the surface.
- Use a damp cloth with mild leather cleaner: Avoid harsh soaps.
- Let the area dry completely: Ensures glue or filler will adhere properly.
Apply Leather Adhesive or Filler
Use the appropriate repair method depending on the tear depth.
- For surface tears: Apply leather filler in thin layers, letting each dry before the next.
- For clean rips: Press both sides together with adhesive and clamp lightly for several hours.
Reinforce If Needed
For deeper tears, add extra support from behind the leather.
- Use a thin patch glued under the tear: Helps support the repaired area.
- Optional stitching: Use saddle stitching for weight-bearing areas.
Sand and Color Match
Smooth the repair area and restore the leather’s color.
- Use fine-grit sandpaper to blend edges: Do this gently to avoid damage.
- Apply matching dye or color balm: Helps blend the fix seamlessly.
Finish with Conditioning
After everything dries, apply a conditioner to restore flexibility and moisture.
- Use a beeswax or lanolin-based conditioner: Keeps leather soft and prevents future cracks.
- Buff with a clean cloth: Restores shine and surface integrity.
Mistakes to Avoid When Repairing Leather
A few common errors can reduce the effectiveness of your repair.
Using the Wrong Products
Not all glues or conditioners are leather-safe.
- Avoid super glue or wood glue: These dry stiff and can crack.
- Stick to tack-specific or leather repair brands: Always test on a small area first.
Ignoring Deeper Damage
Some damage isn’t repairable at home.
- If stitching is broken or leather is too brittle, seek professional help.
- Don’t use repaired tack for critical riding tasks if unsure of strength.
FAQs
Here are some questions and answers about repairing small tears in leather:
Can you repair a leather tear without stitching?
Yes, small surface tears and clean rips can often be repaired using leather glue and filler, especially in non-weight-bearing areas.
How long do leather repairs last?
With proper products and care, small leather repairs can last several years. Regular conditioning and light use extend durability.
What if my saddle tears near the stirrup bar or billet strap?
These are high-tension areas. While you can assess them at home, it’s best to have a professional saddle fitter or repair specialist handle the fix for safety.
Will the repaired area feel or look different?
A well-done repair blends in with the leather’s texture and color. Minor differences may be noticeable up close, but proper sanding and dyeing minimize this.
How can I prevent future leather tears?
Clean and condition your tack regularly, avoid overexposure to sun or moisture, and store tack properly in a cool, dry area. Address small scratches before they become major issues.
Repairing small tears in leather is a smart and simple way to extend the life of your tack. With the right tools, attention to detail, and a little patience, you can restore your gear to a safe and serviceable condition, all without the need for professional intervention.